

1. Get the installer and your license key.
2. Uninstall the Previous Version and Delete OFX Cache
If Look Designer is installed already, keep reading. If not, go to step 4.
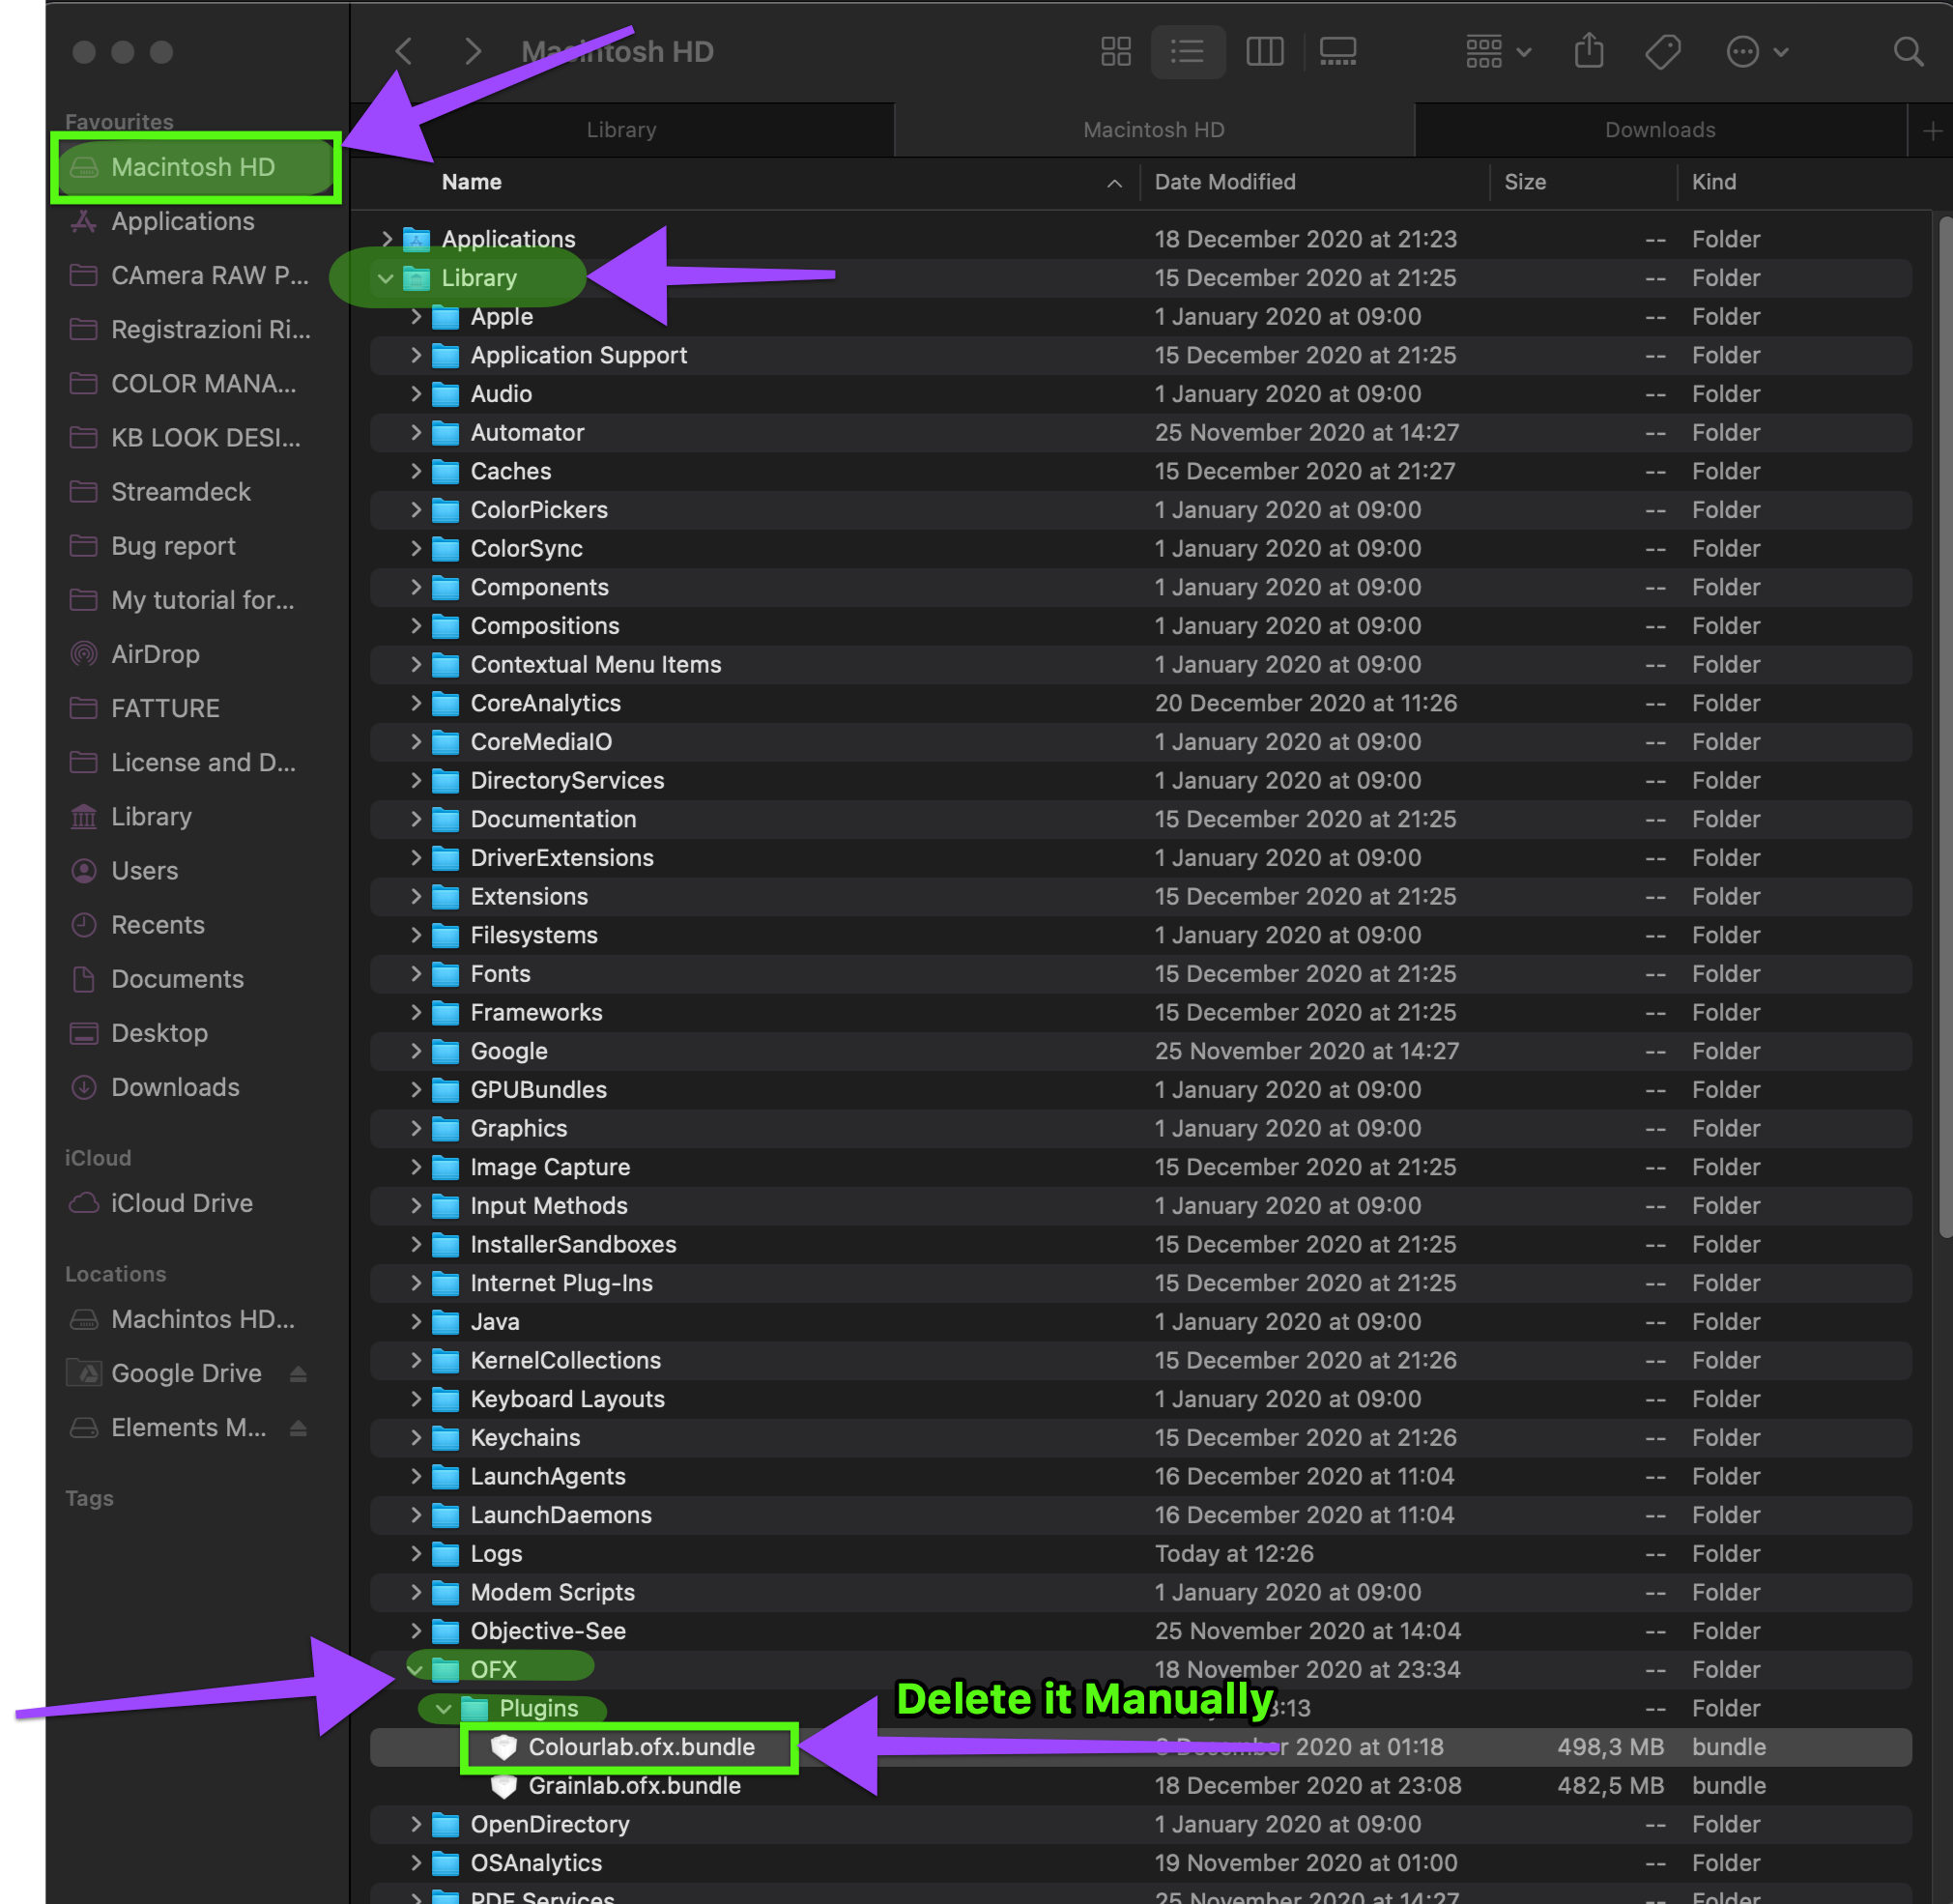
On OSX, there are two Libraries. One exists on your OS Drive (Macintosh HD in the Screenshot), and one sits in your User Folder (Your login username).
Plugins for Resolve are based on OFX, and can be found in Library/OFX/Plugins. This is on your OS Drive.
Go into the folder and delete LookDesigner2.0.ofx.bundle. If you see Colourlab.ofx.bundle (old version of Look Designer 1.0), you can delete it as well, or keep it for legacy projects.
3. Delete OFX Cache
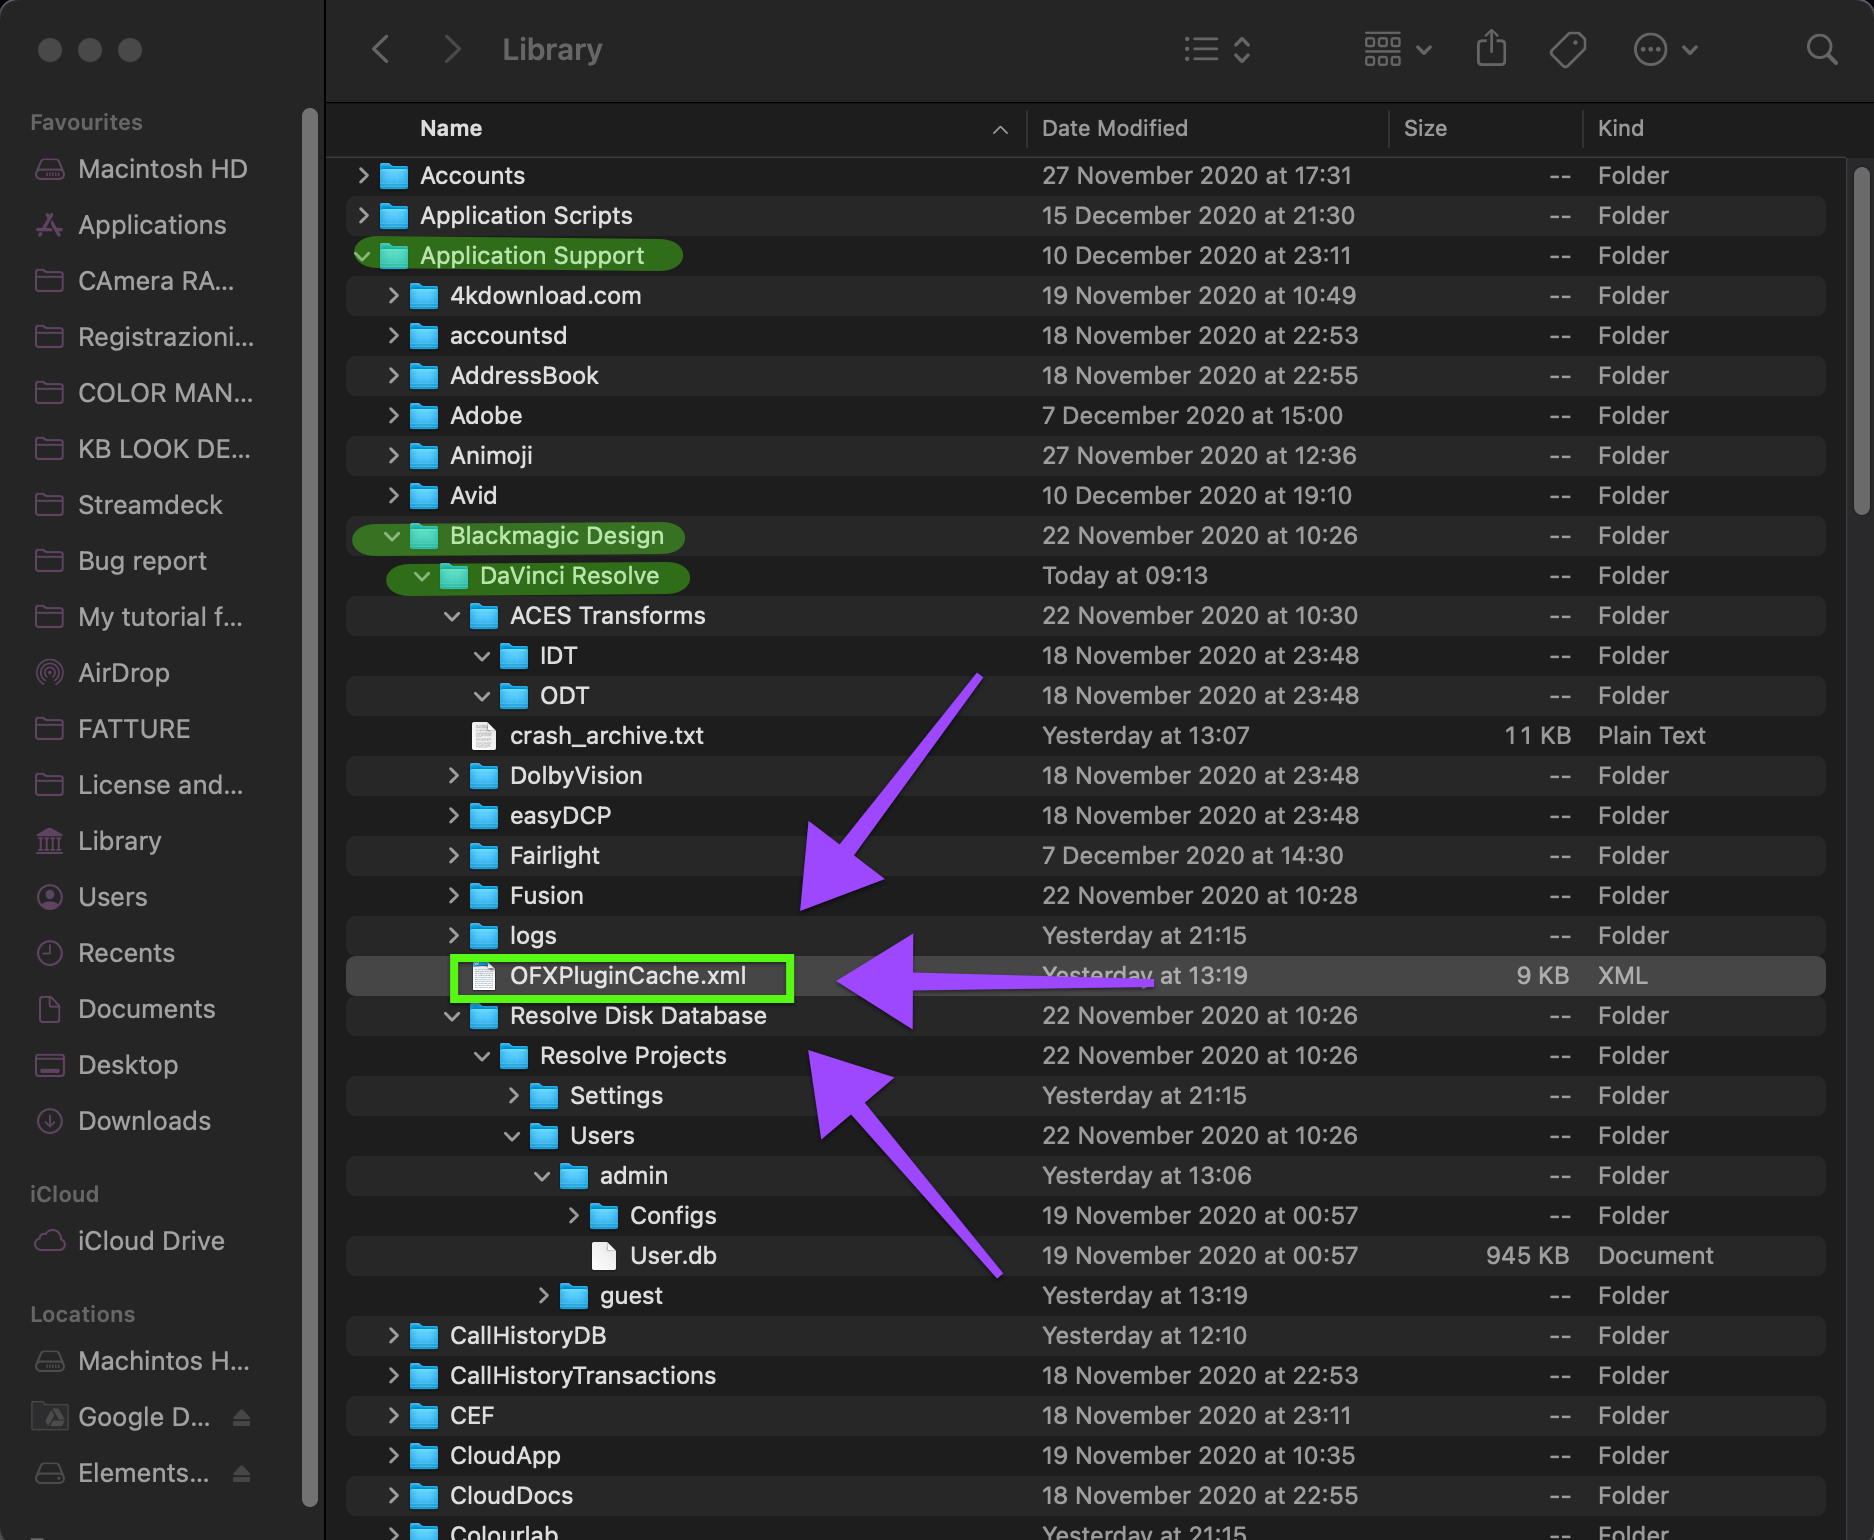
The second Library is hidden. To find it, go to Finder, click on Go while holding the Alt key. An entry for Library will appear. OFXPluginCache.xml resides in [User Libary]/Application Support/Blackmagic Design/Davinci Resolve. Delete it.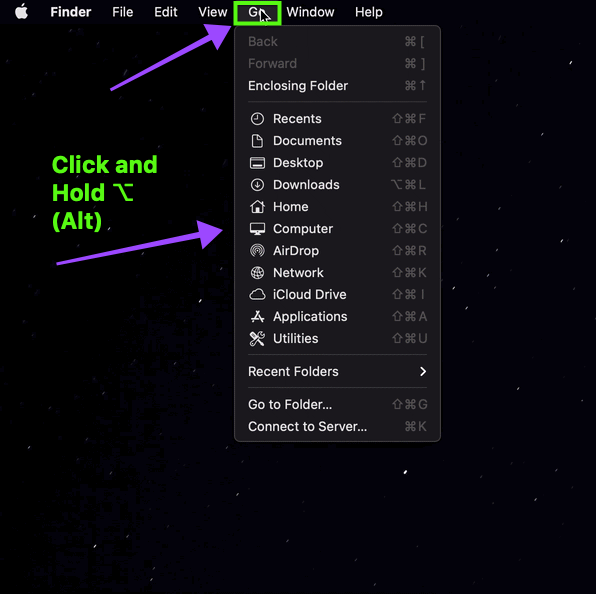
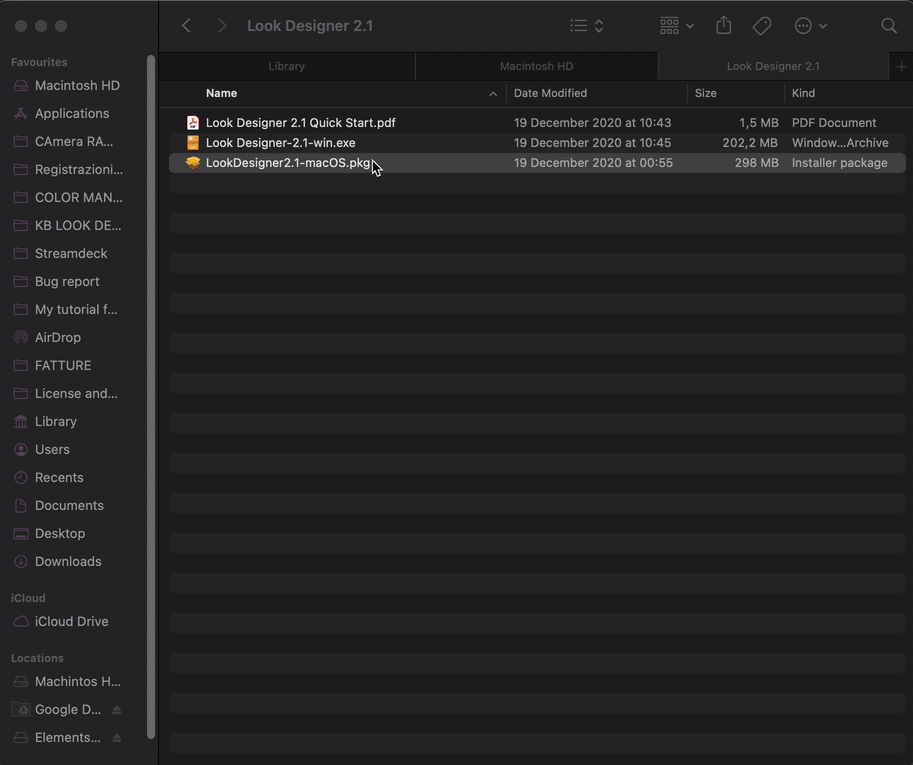
3.Unzip and Double-Click on the PKG file to start the installation
The .exe is for Windows.
4. Load the plugin into a node
Launch DaVinci Resolve and go to the Color Page. Click on the clip you want to operate, and in the node tree create a node (Alt+S /⌥S), where you load LD2.4 OFX Plugin.
We recommend you to use LD2.4 on the second node, leaving the first node for CDL.

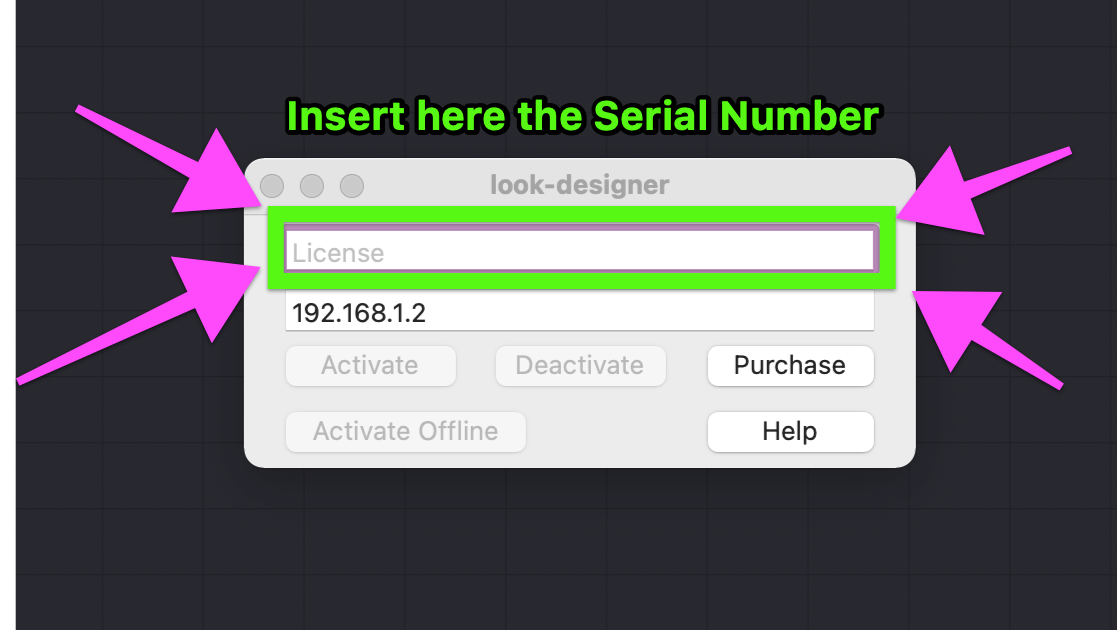
5. Activate the plugin
Scroll down the OFX options and click on "License". Copy and paste your Serial Key, which you can find it on your https://www.colourlab.ai account in the license management section, and hit Activate.

We hope this tutorial has been helpful to you.
If you have other questions please contact