

1. Right Setting, Best Results
In order to get the best results from your image, you need to set the Camera RAW Profile on DaVinci Resolve in the right mode, so you will able to use the High Dynamic Range and Wide Color Gamut
First of all, you need to open the Project Settings menu, you have three options to do that:
1) On DaVinci Resolve, go to the File drop-down menu and select Project Settings...

2) By Clicking on the Cogwheel icon in the Resolve App Window at the Bottom Right.
3)Simply digiting the shortcut SHIFT 9 on your Keyboard.
Once you are in Project Settings Tab, click on Camera RAW to open it.
2. Set ARRI Alexa Camera RAW Profile
Set ARRI RAW Profile is very simple because there is only one set which is ALEXA WIDE GAMUT LOG-C
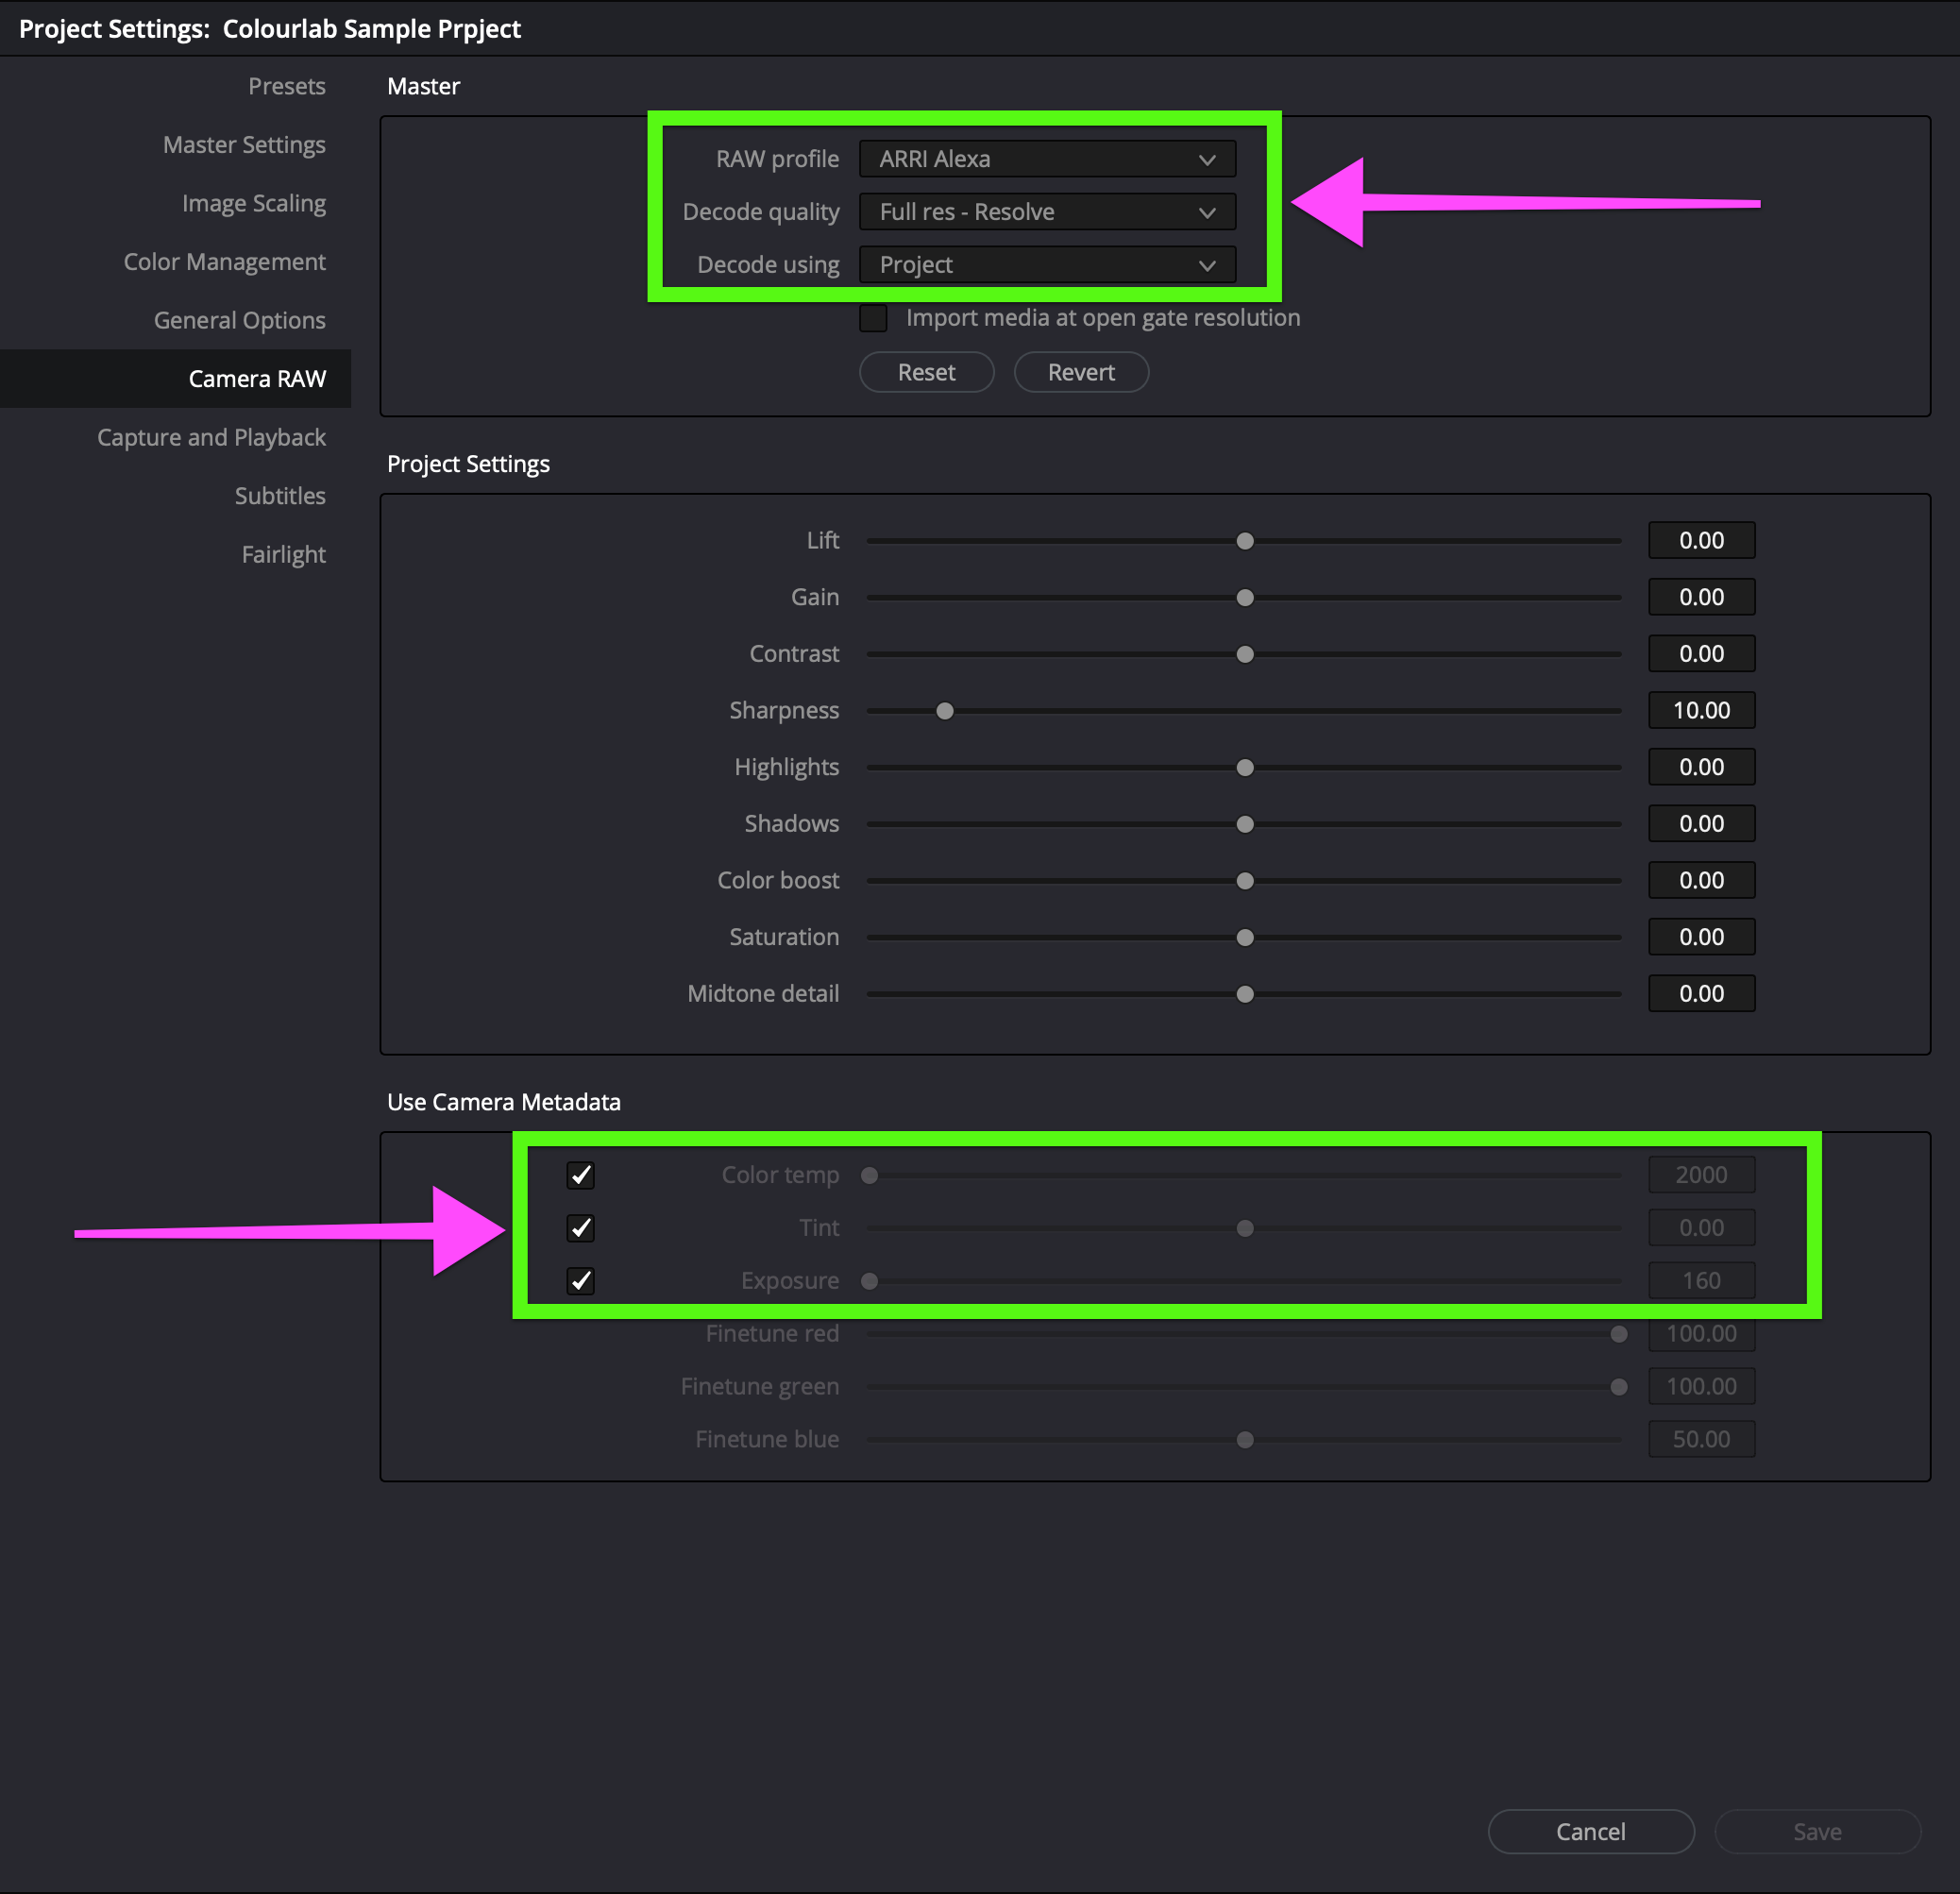
In RAW profile choose ARRI Alexa
Leave the Decode Quality to Full Res - Resolve so DaVinci can use GPU acceleration
In Decode Using drop-down menu choose Project
In the Use Camera Metadata tab check the Color Temp, Tint, and Exposure boxes
See the image below
3. Set Blackmagic Camera RAW Profile
To get the best results for Blackmagic footage you need to set Color Space to Blackmagic Design and Gamma to Blackmagic Design Film
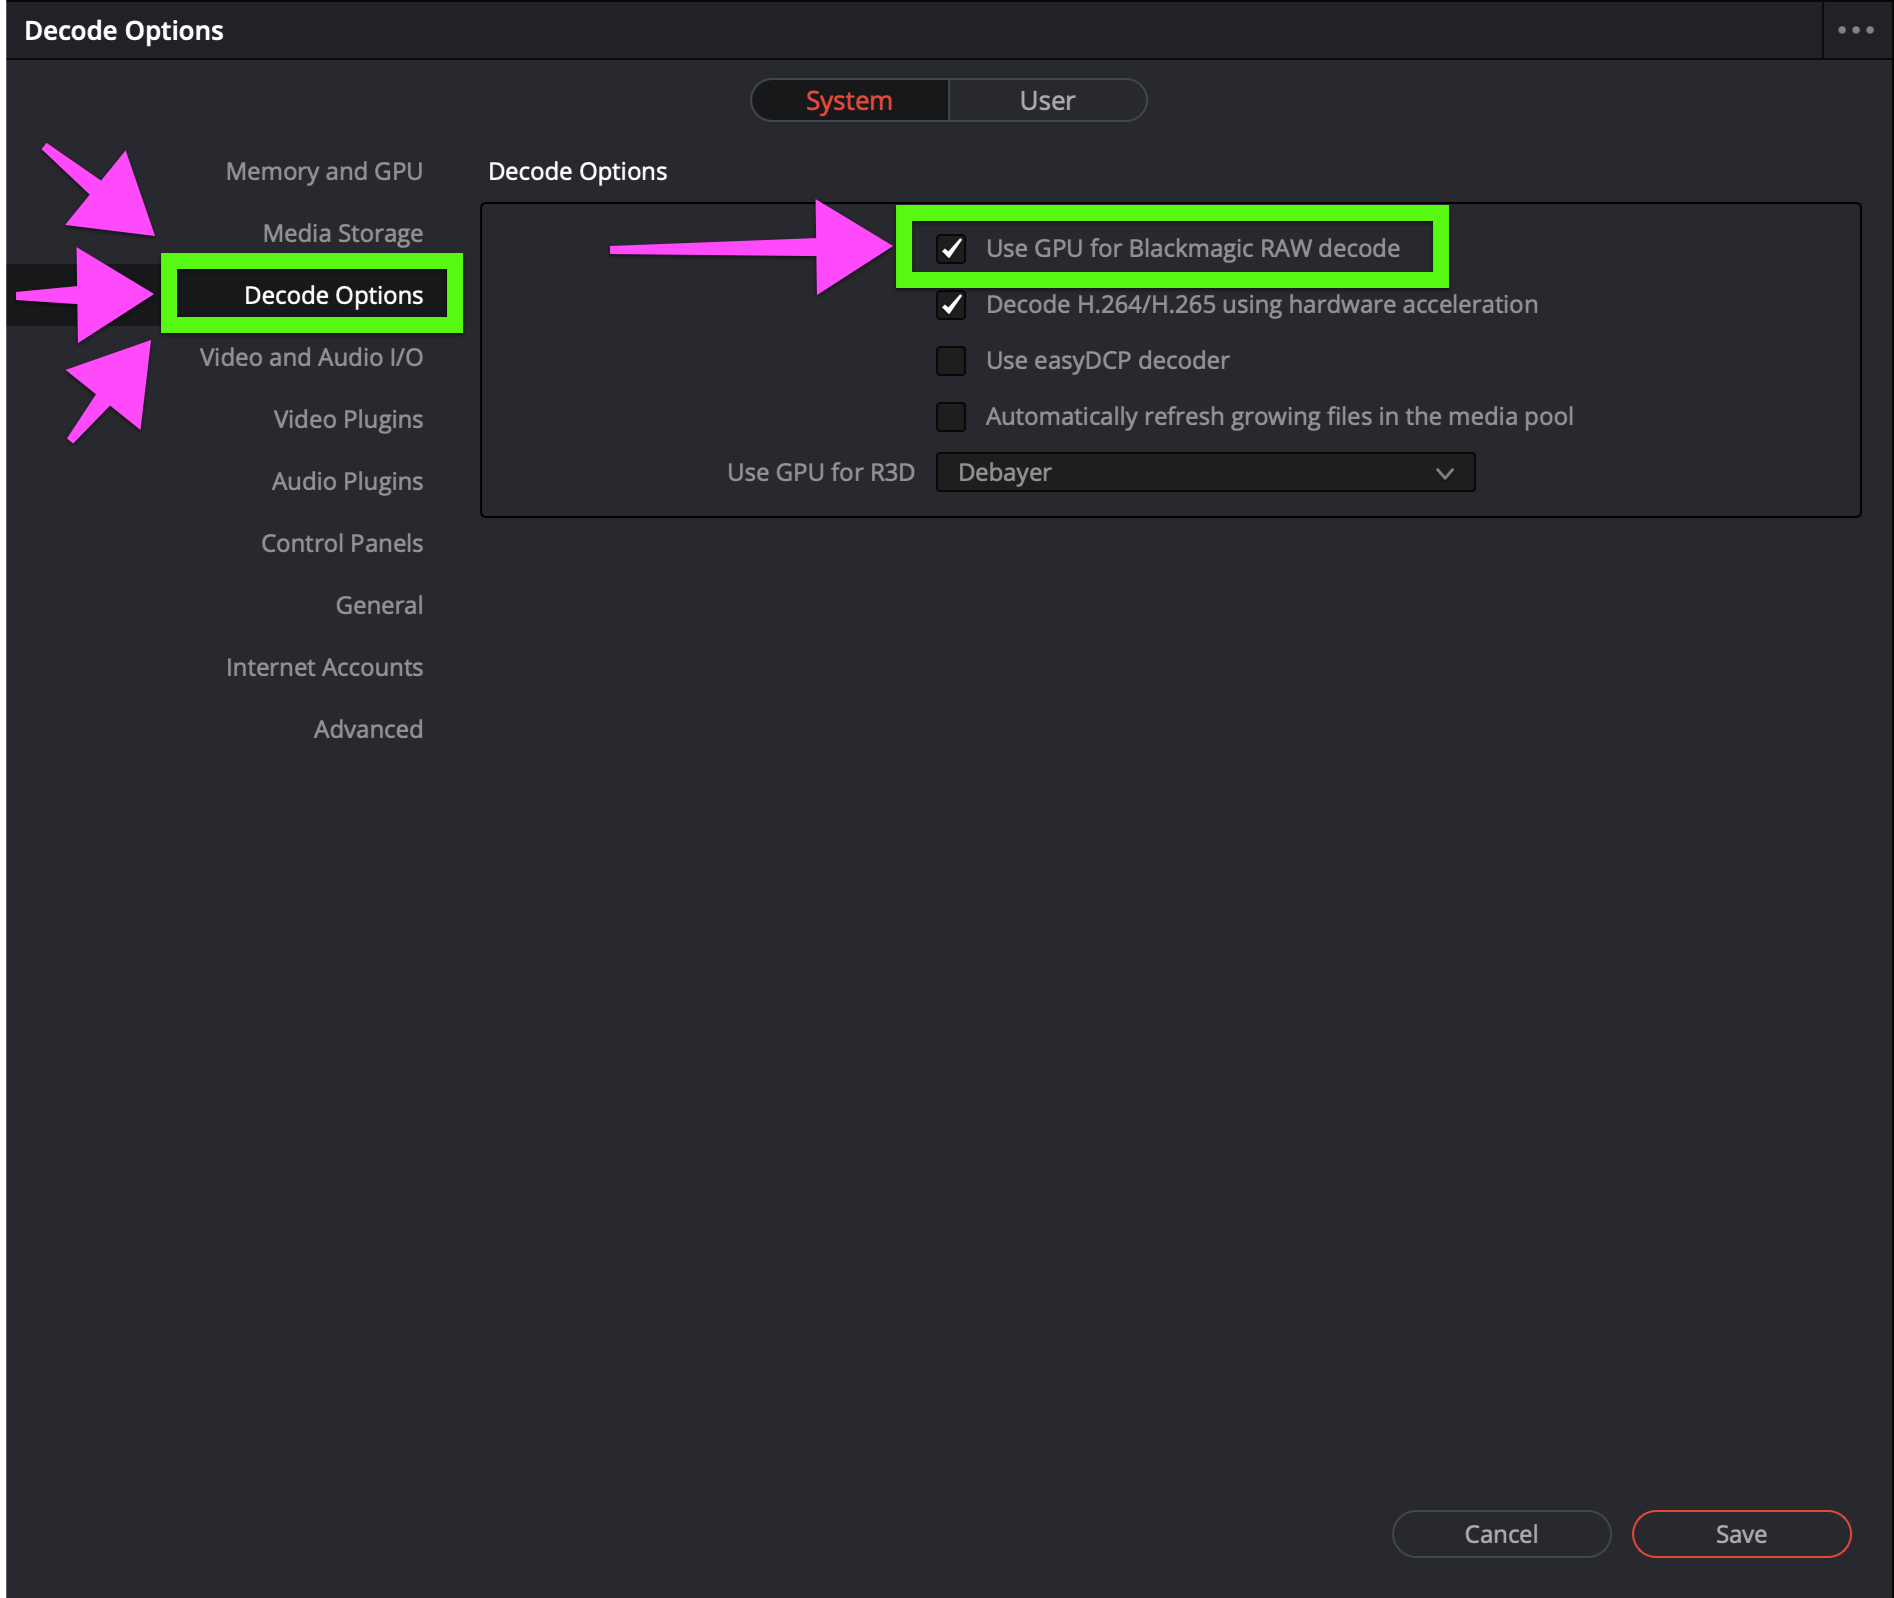
First of all, make sure that in Decode Options ( DaVinci Resolve => Preferences...=> Decode Options) you have the Use GPU for Blackmagic RAW decode activated.
Now come back to the Project Settings menu:
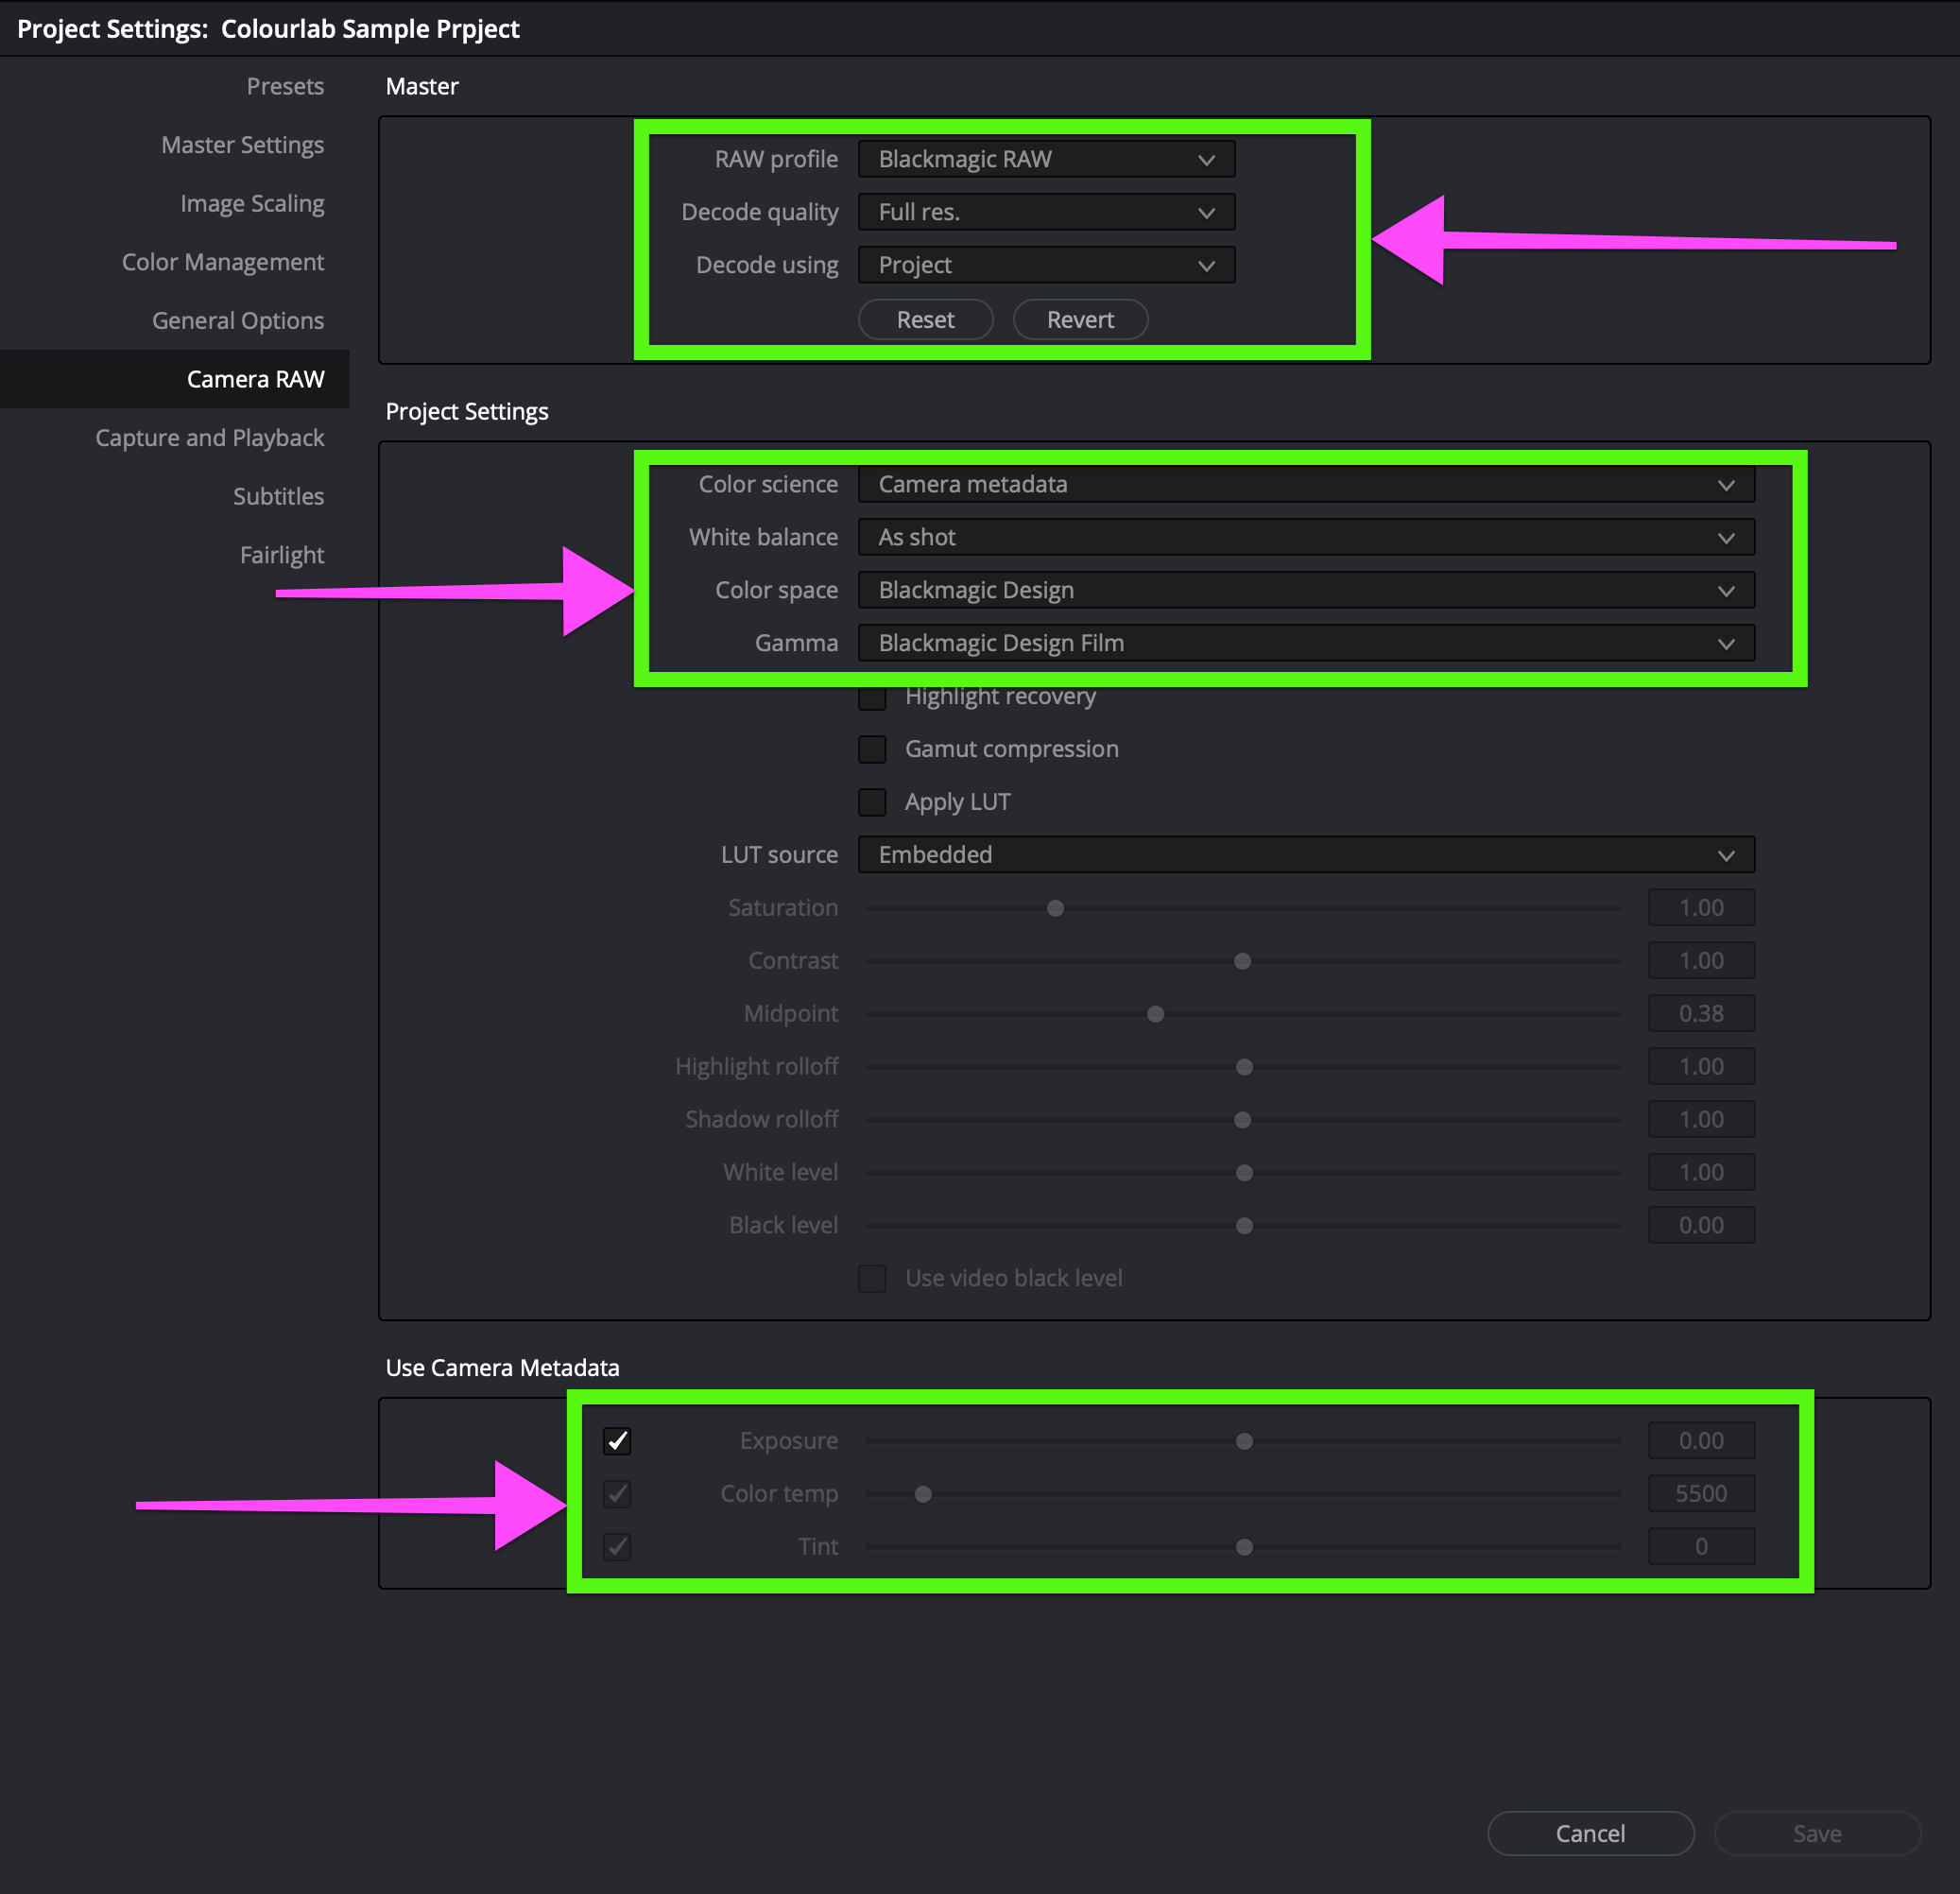
Settings for Master Tab
In RAW profile choose Blackmagic RAW
Leave the Decode Quality to Full Res - Resolve so DaVinci can use GPU acceleration
In Decode Using drop-down menu choose Project
Settings for Project Settings Tab
Leave the White Balance as shot by the Cinematographer
In the Color Space drop-down menu select Blackmagic Design
In Gamma select Blackmagic Design Film
Settings for Use Metadata Tab
In the Use Camera Metadata tab make sure to check the Exposure box.
See the image below
4. Set RED Camera RAW Profile
RED needs a little more complicated setting.
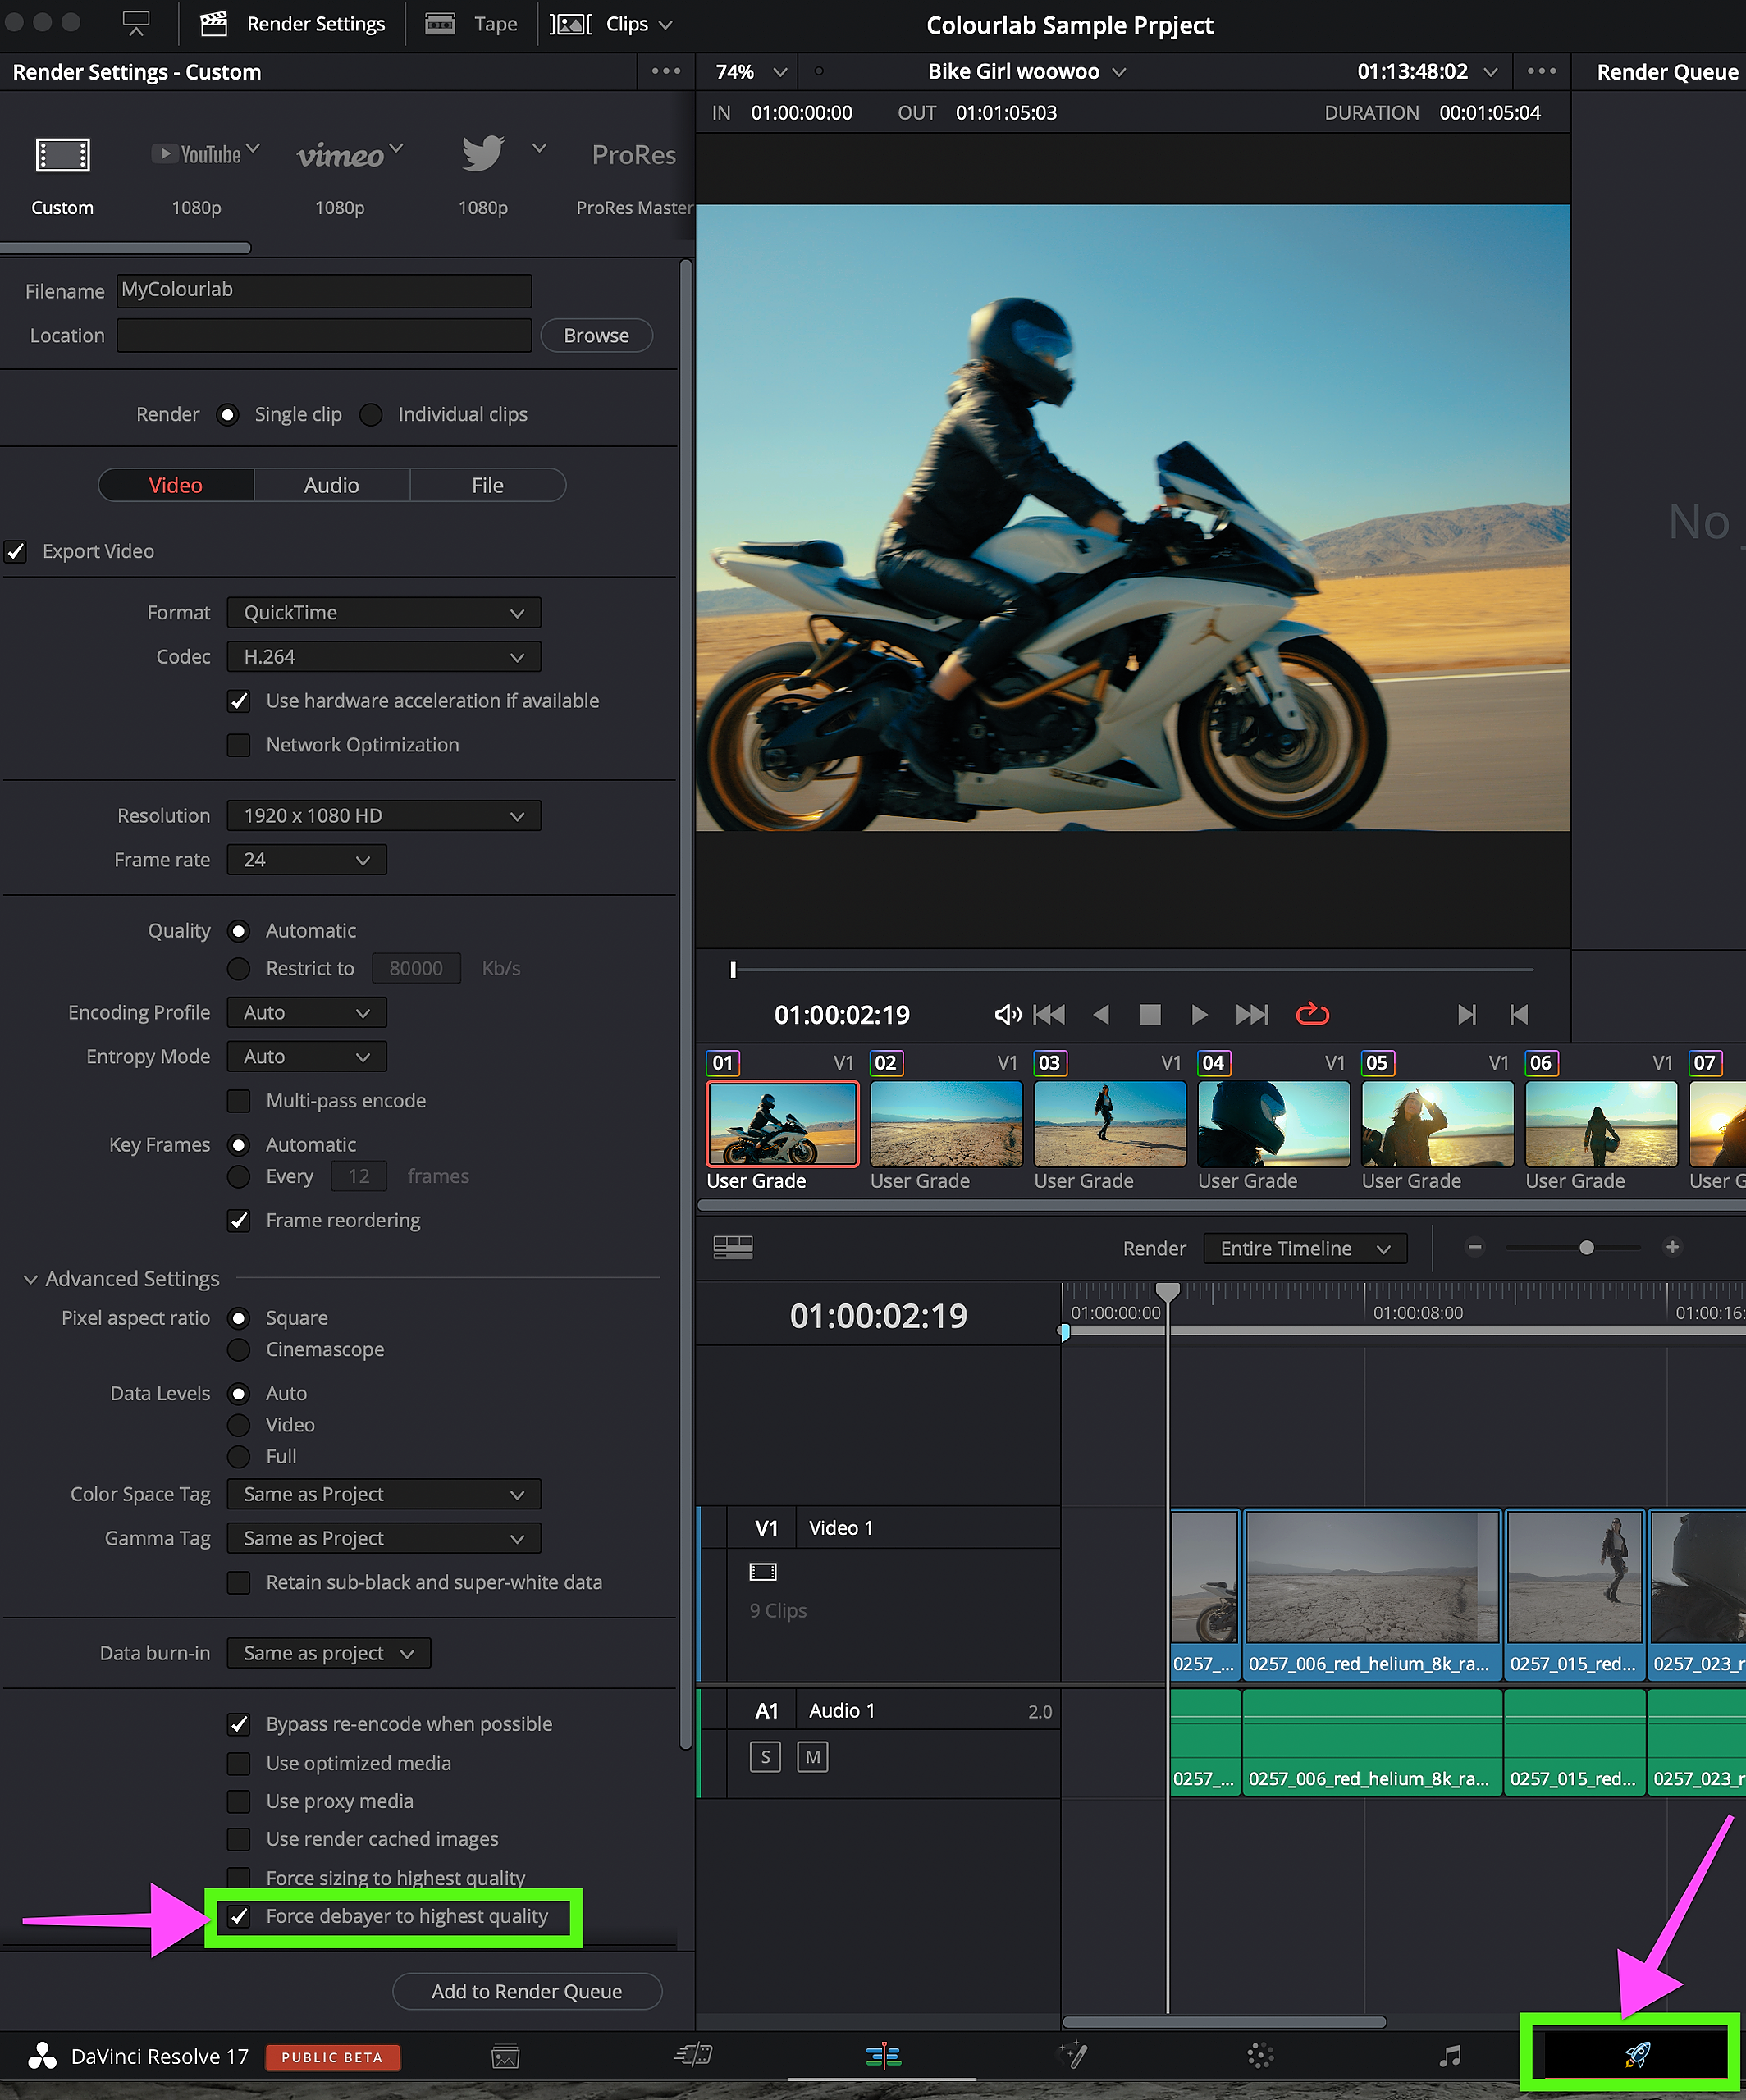
First, you need to go on Decode Options ( DaVinci Resolve => Preferences...=> Decode Options) and on the Use GPU for R3D drop-down select Debayer.

Now it's time to go to the Project Settings menu:
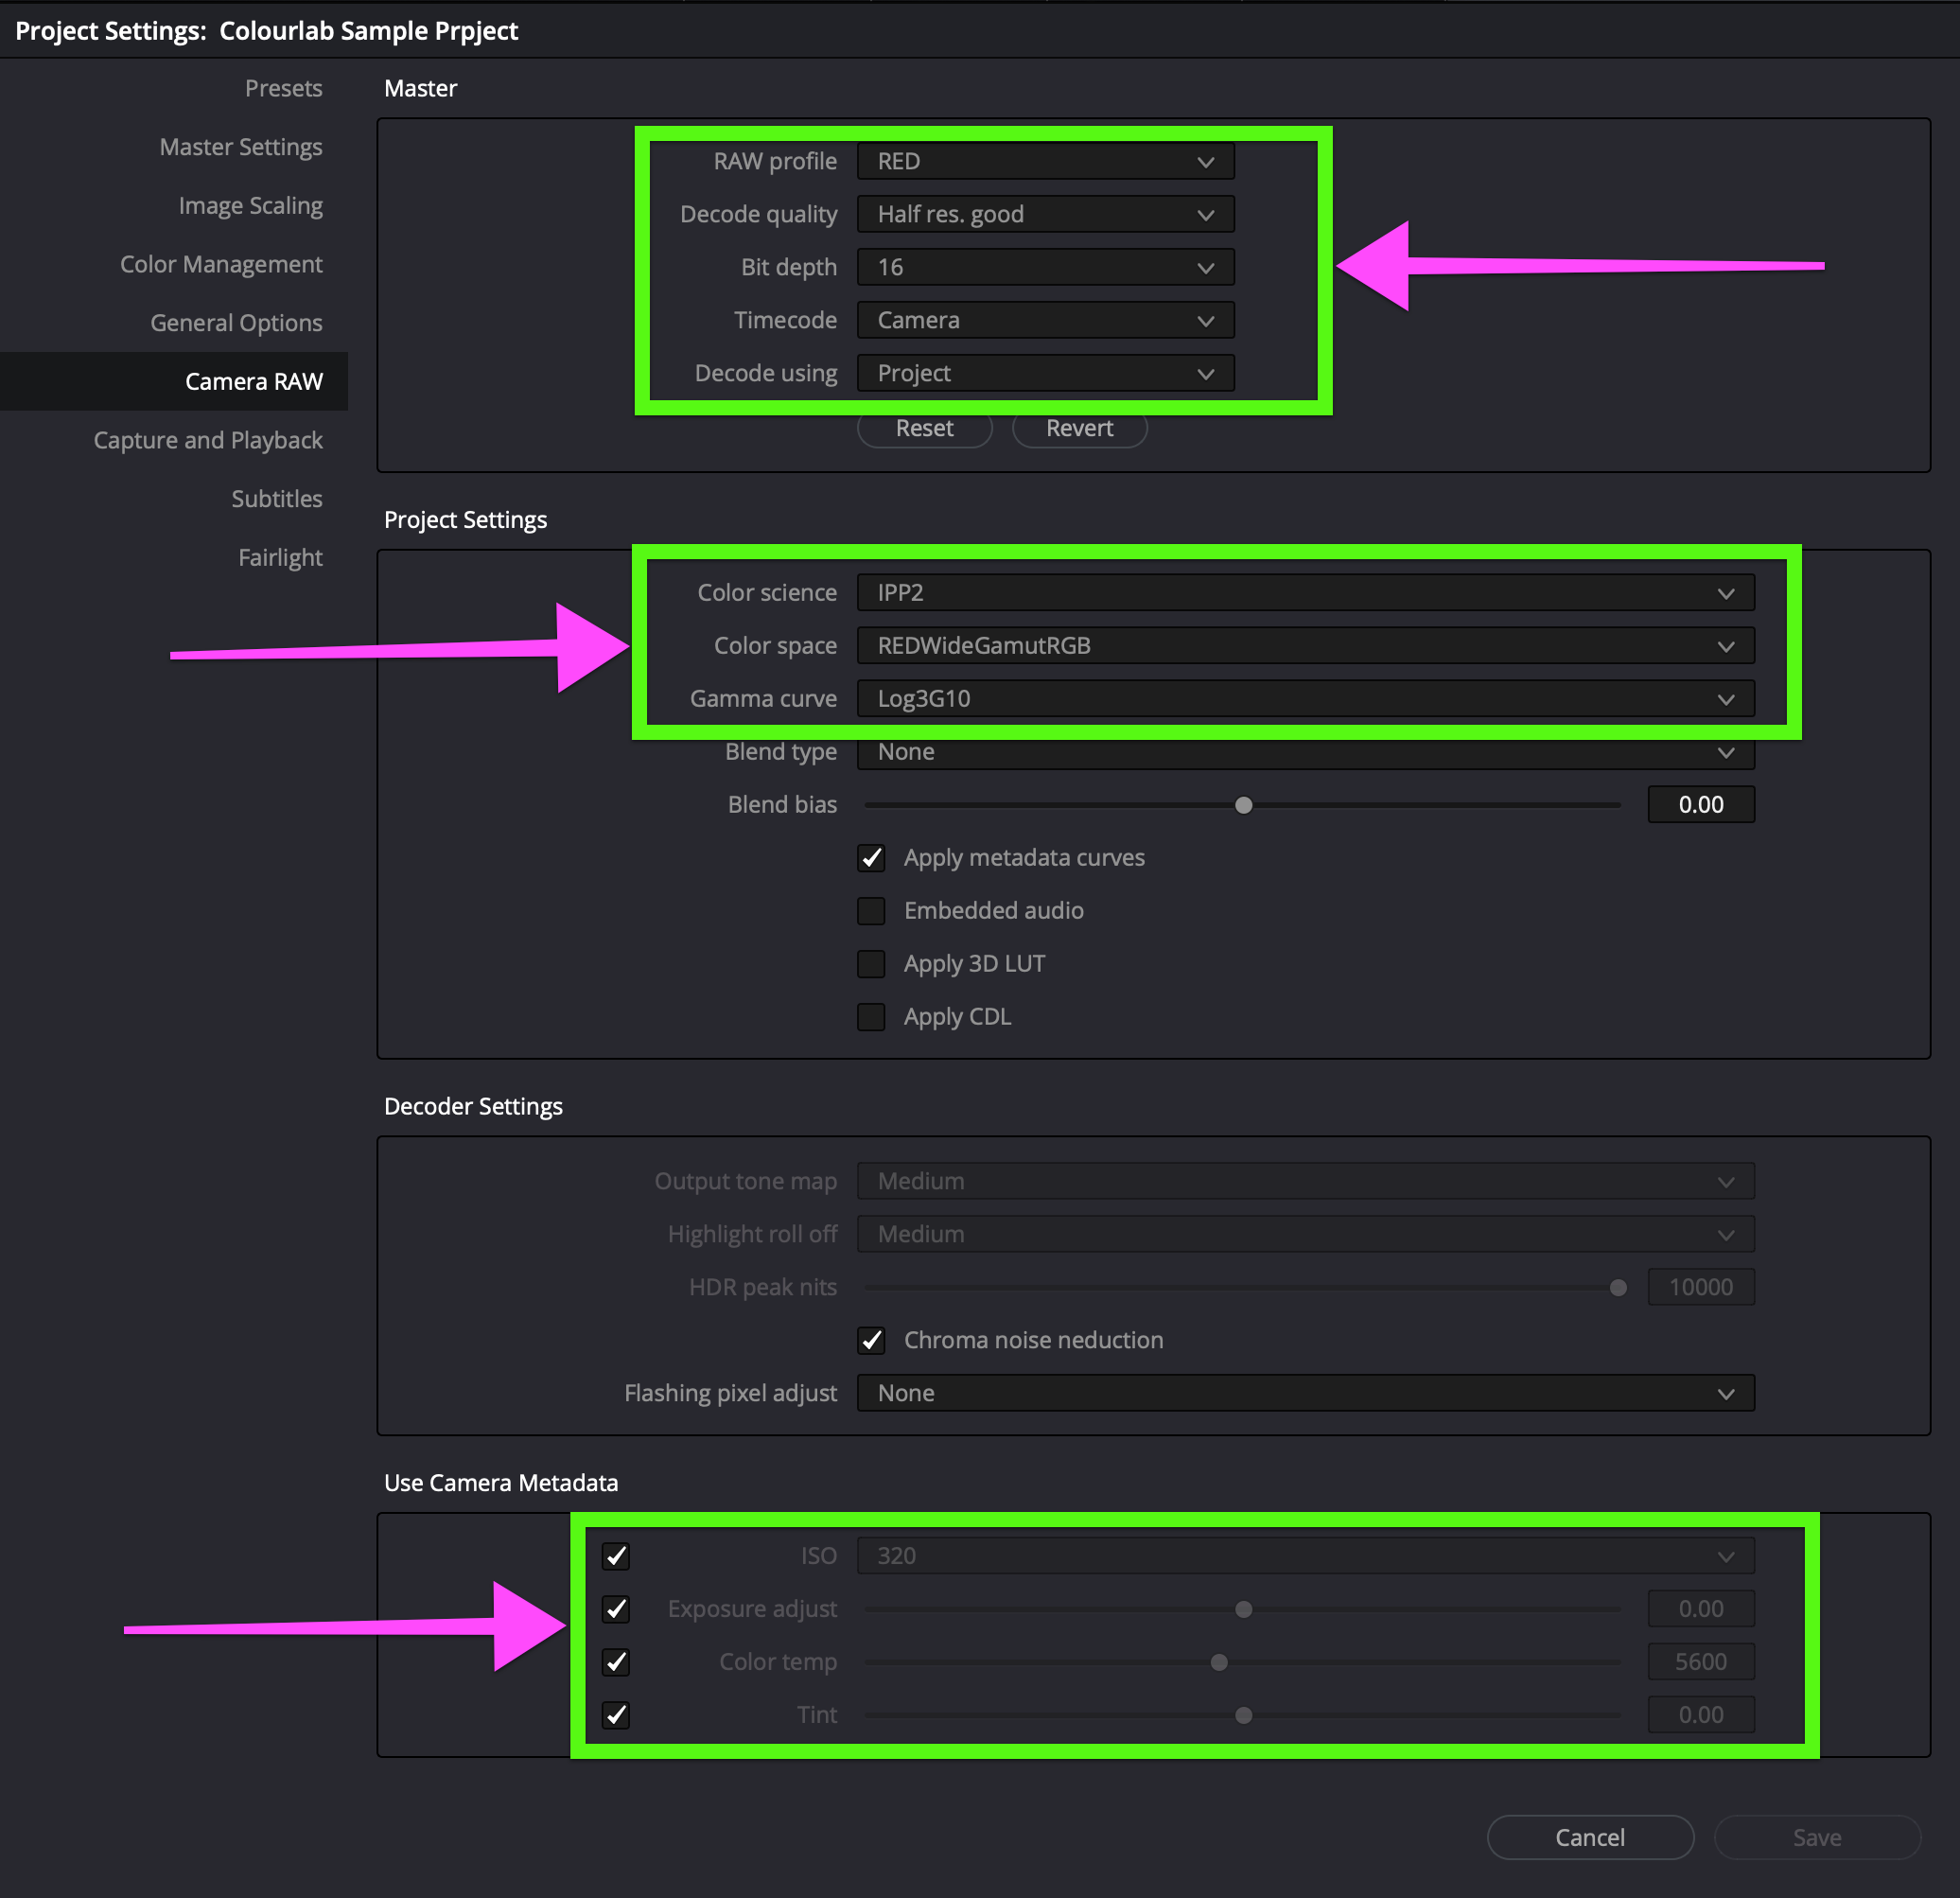
Settings for Master Tab
In RAW profile choose RED
In Decode Quality you can use Half res. good, but if you have a performing hardware system, you can choose a higher resolution, because this parameter is only relevant for your timeline when you playing back, but when you render it you need to check the Force debayer to highest quality. You can find Force debayer to highest quality on the Deliver page.
In Decode Using drop-down menu choose Project
Settings for Project Settings Tab
In Color Science make sure to have selected IPP2
In the Color Space drop-down menu select REDWideGamutRGB
In Gamma select Log3G10
Settings for Use Metadata Tab
In the Use Camera Metadata tab make sure to check the ISO, Exposure adjusts, Color temp, and Tint boxes
See the image below
5. Set SONY Camera RAW Profile
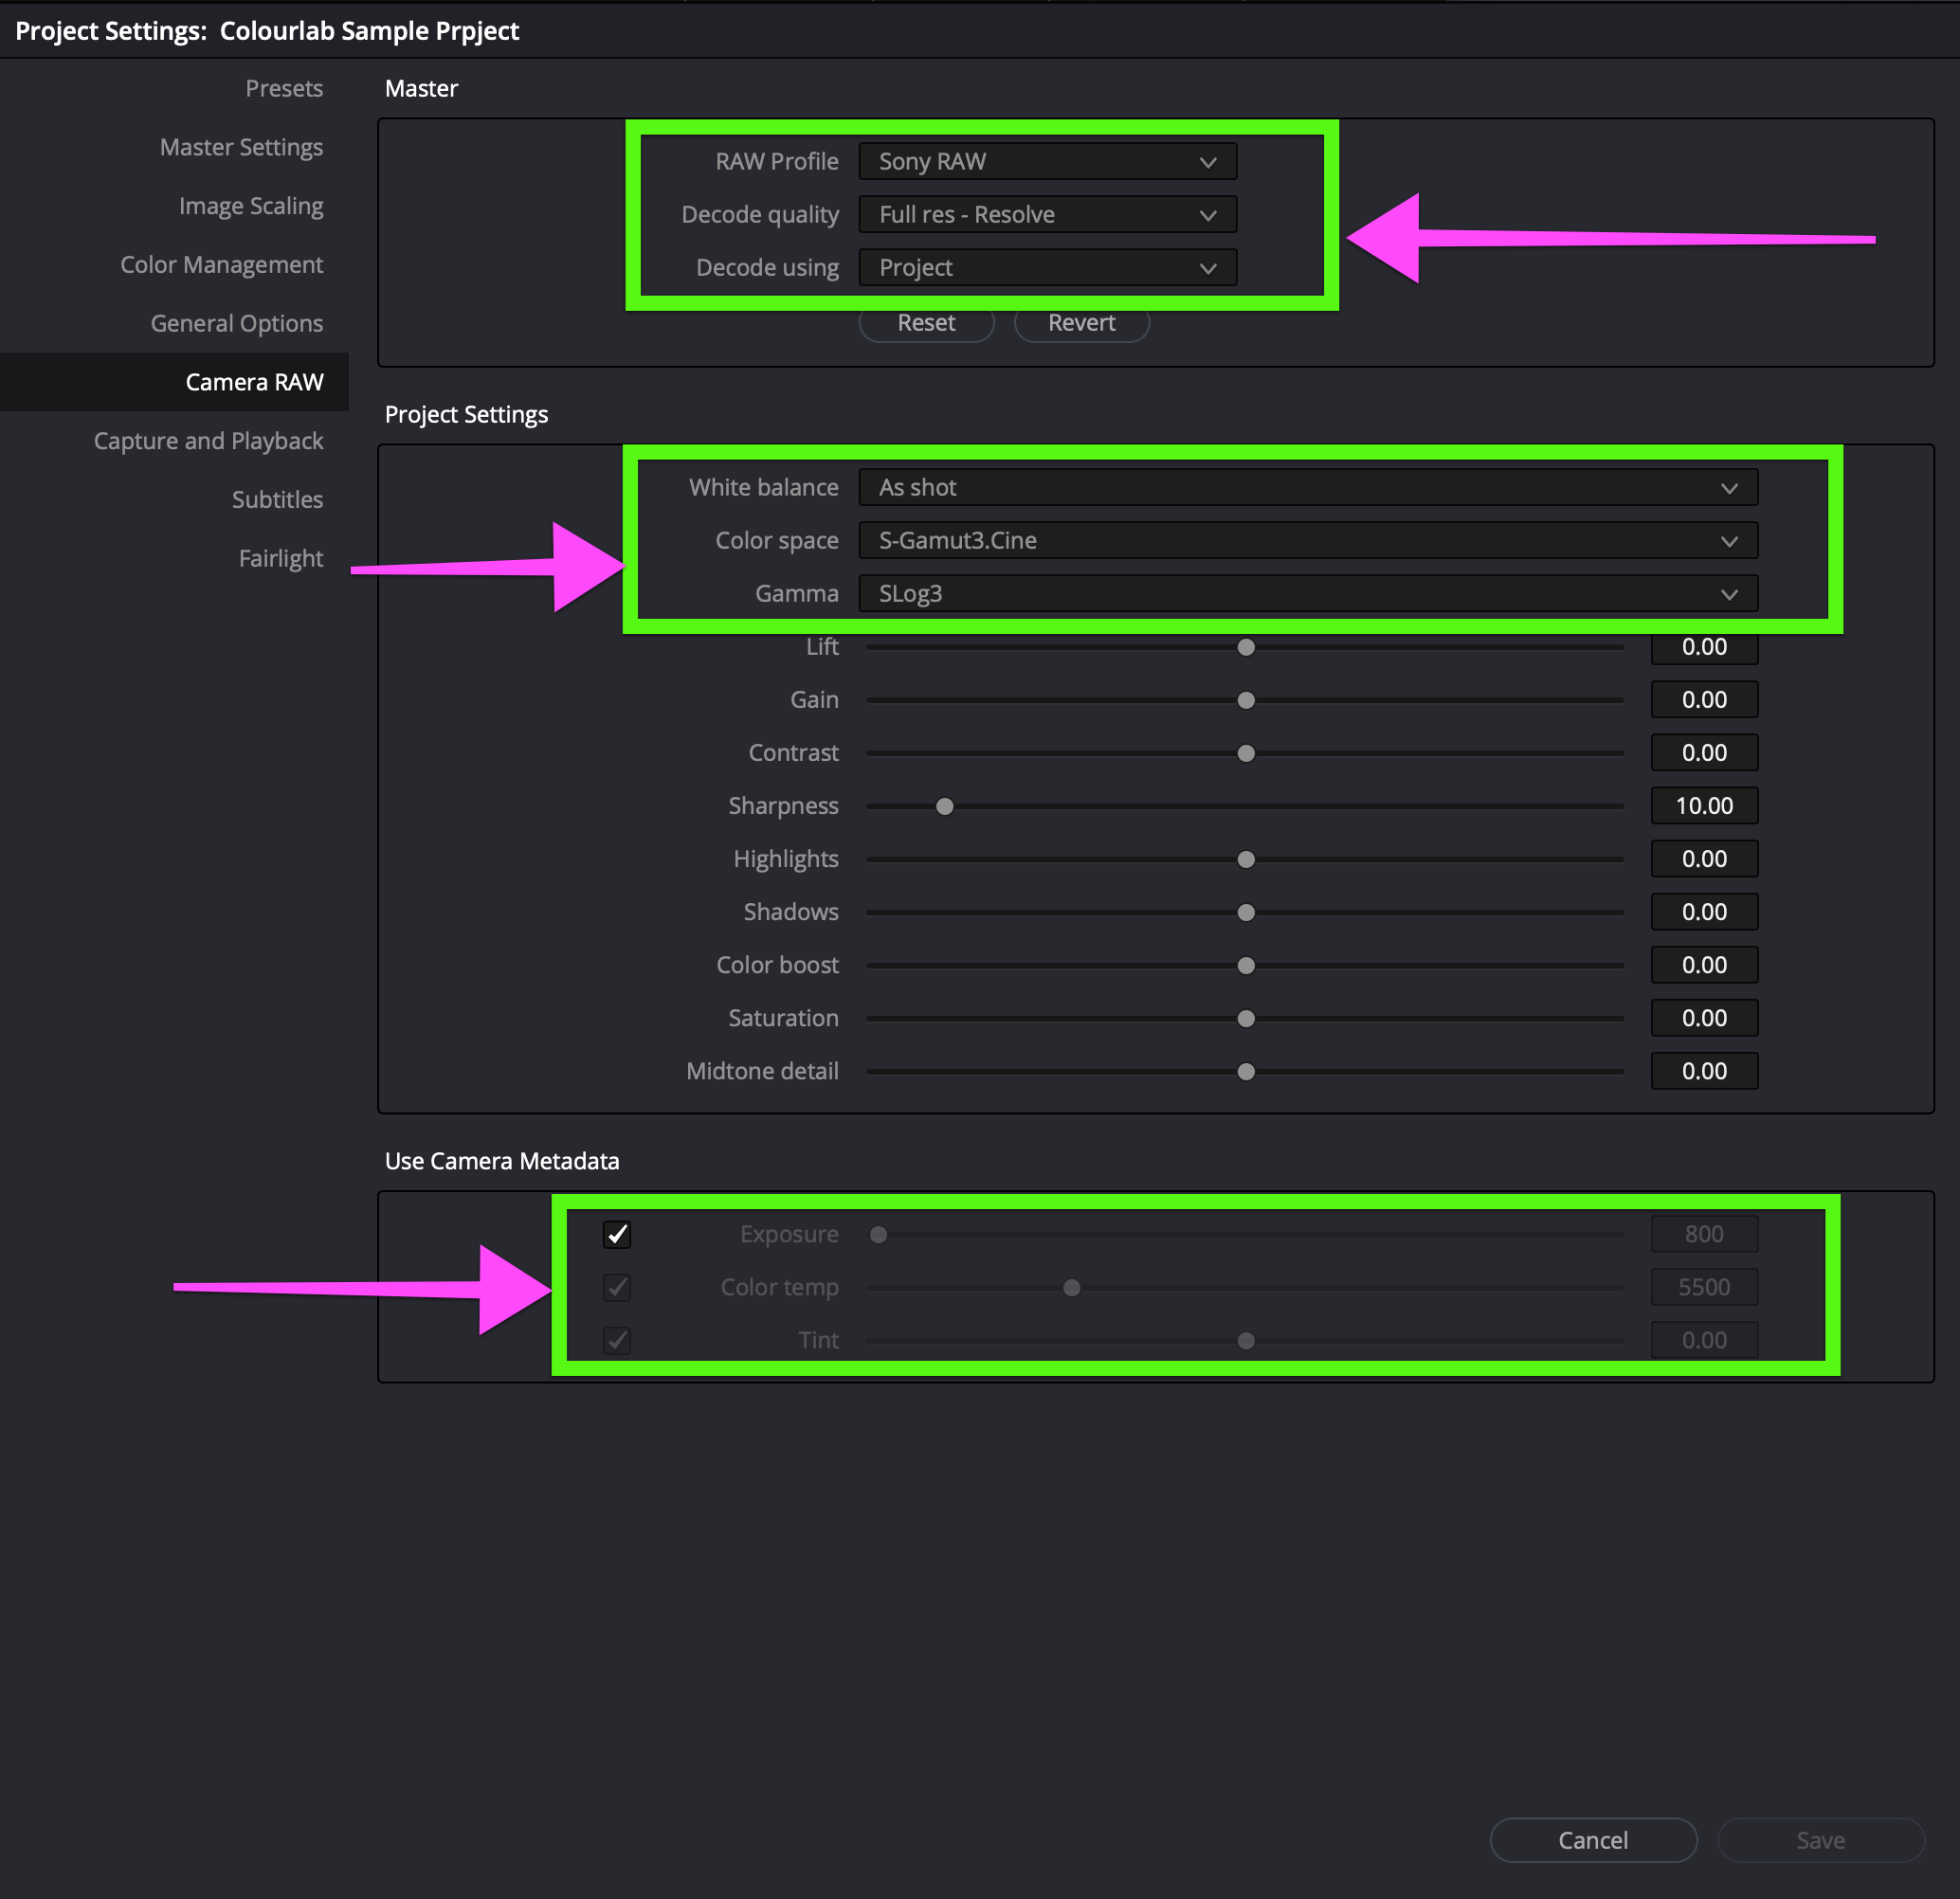
To get the best results for SONY footage you need to set Color Space to S-Gamut3.Cine and Gamma to SLog3
Settings for Master Tab
In RAW profile choose SONY RAW
Leave the Decode Quality to Full Res - Resolve so DaVinci can use GPU acceleration
In Decode Using drop-down menu choose Project
Settings for Project Settings Tab
Leave the White Balance as shot by the Cinematographer
In the Color Space drop-down menu select S-Gamut3.Cine
In Gamma select SLog3
Settings for Use Metadata Tab
In the Use Camera Metadata tab make sure to check the Exposure box.
See the image below
We hope this tutorial has been helpful to you.
If you have other questions please contact