

1.Add Scene Marker in Colourlab
We have two very simple ways to add a scene marker in Colourlab:
A) BY USING THE CLAPPERBOARD ICON BUTTON IN THE TIMELINE - Go to the Colourlab Timeline and select the Clip you want to be the first shot of your Scene and then Click on the "CLAPPERBOARD" Icon situated on the right side of Timeline.
B) USING THE KEYBOARD SHORTCUT - The same procedure as before, go to the Colourlab Timeline and select the Clip you want to be the beginning of your Scene and press M on your keyboard
2.Delete Scene Marker in Colourlab
Same as before, we have two very simple ways to delete the scene marker in ColourLab:
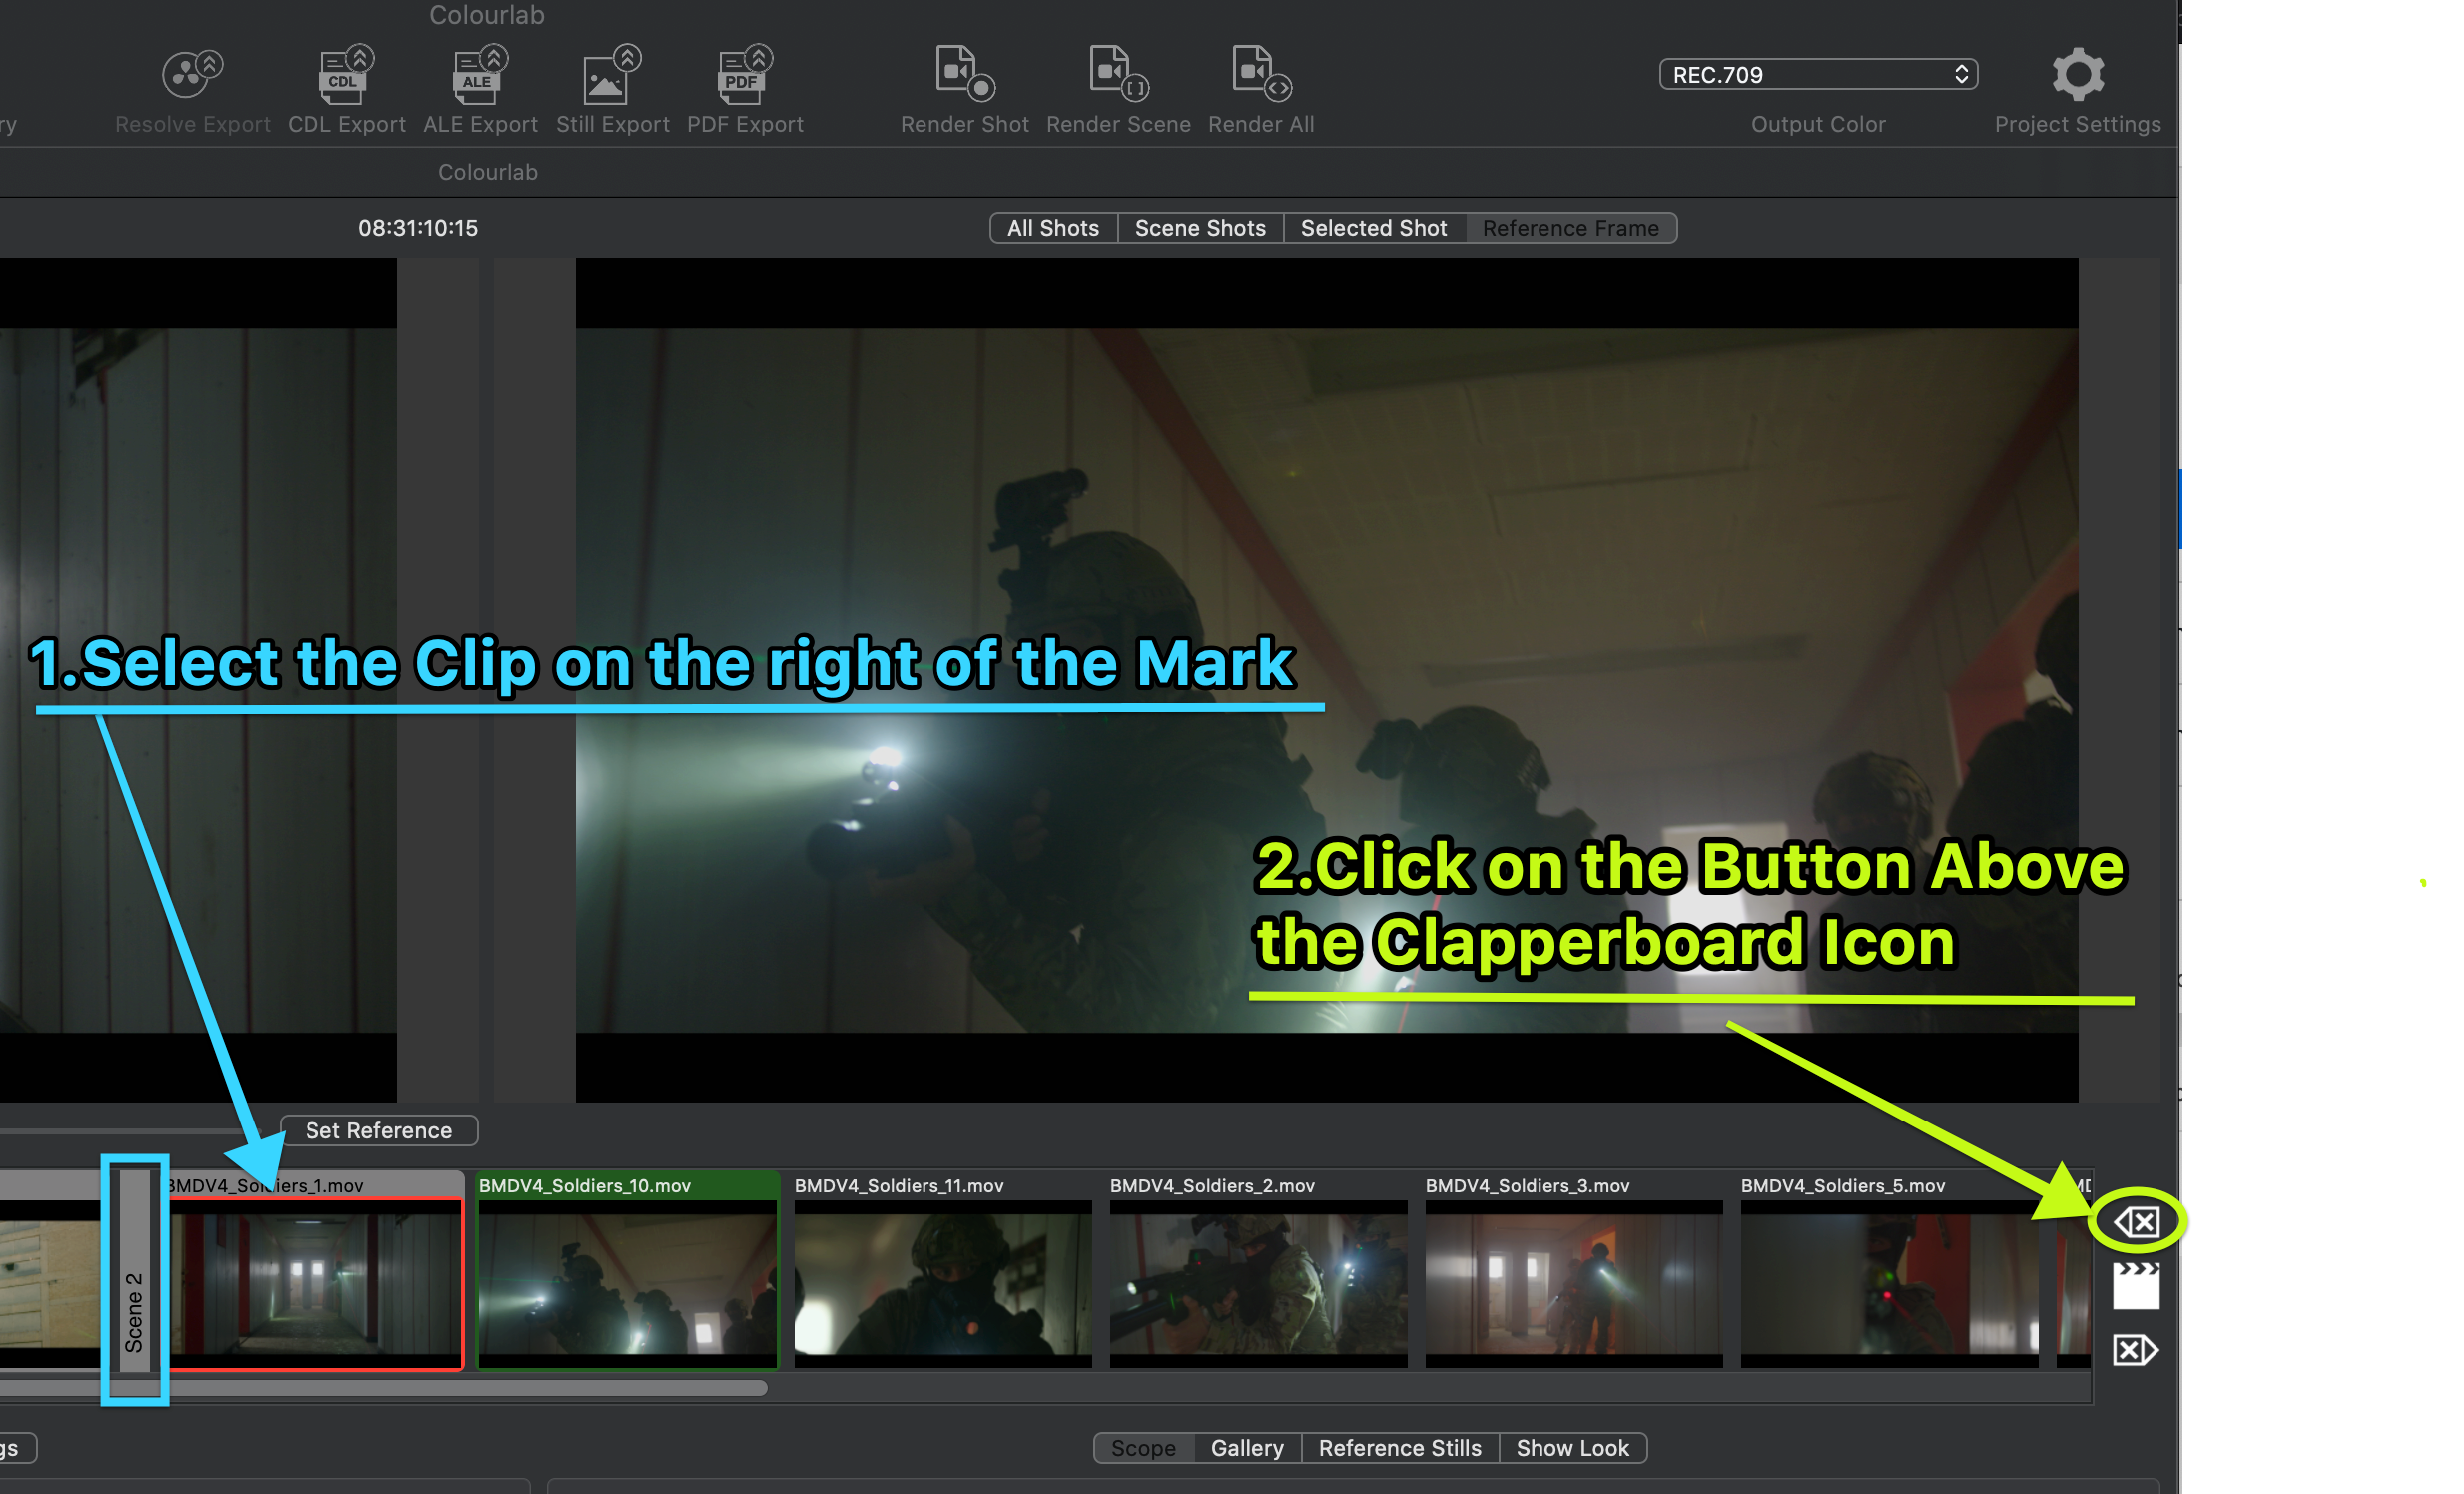
A) BY USING THE TWO ICONS BUTTON IN THE TIMELINE - You have two ways to do it.
The first is to select the Clip on the right of the Scene Marker and then Click the button above the "Clapperboard" Icon
The second is to select the Clip on the left of the Scene Marker and then Click the button below the "Clapperboard" Icon

B) USING THE KEYBOARD SHORTCUT - Go to the ColourLab Timeline and select the Clip you that is the beginning of your Scene and press SHIFT + M ( ⇧+M ) on your keyboard.
Alternative is to select the Clip on the left of the Scene Marker and the press CRTL+M ( ⌃+M ) on your keyboard.
We hope this tutorial has been helpful to you.
If you have other questions please contact